Face a Window for Soft, Natural Light
Light decides most of a home profile photo. The easiest and best source is daytime light from a large window. Instead of harsh direct sun, you want soft light, the kind you get on an overcast day or when sunlight has already bounced off a wall or curtain. A thin white curtain drawn partway adds one more layer of softening, and a shaded or north-facing window often gives steady light all day.
The key move is to stand facing the window directly. With the window behind you, you get backlight and your face falls into shadow. With the window to one side, only half lights up and the shadows get heavy. Step a pace back from the glass and face it head on so the light spreads evenly across your face, and a small catchlight lands in your eyes to keep them bright and alive.
From late morning to early afternoon, window light tends to be the most stable. Color and strength shift through the day, so move around for a minute and find the brightness you like best. Once you find a spot you like, a small mark on the floor helps you return to it.
Avoid Overhead and Mixed Light
A common mistake is leaving the ceiling fluorescent or a living-room fixture switched on. Light coming straight down from above digs shadows under the eyes and below the nose and can read as tired. When you shoot with window light, it is often cleaner to switch the overhead lights off.
Watch out for light of different colors mixing too. When cool daylight from the window meets warm bulb light in one frame, one side of the face goes yellow and the other goes blue, which is hard to fix later. Keeping a single kind of light is cleanest: daylight alone, or if that is too dim, one lamp of a similar color temperature.
If the light is so weak that photos come out blurry, move closer to the window, or stand a sheet of white paper or a white towel on the opposite side to bounce a little light back onto your face. Even one homemade reflector noticeably softens the shadows on the darker side.
Keep the Background Simple: One Wall Is Enough
The star of a profile photo is the face. A busy background scatters attention, so a clean plain wall is the best choice. White, light grey, or a calm solid color all work, as long as it is not too close to the color of your clothes. If wall and clothes match, your face and shoulders blur into the background.
If you do not have a good wall, just tidying up is enough. Clearing a drying rack, a cluttered desk, or stray cables out of the area that will be in frame makes the shot look far more put together. Stepping a pace or two forward from the background also blurs it slightly so your face stands out more.
Check that a door frame, the edge of a picture, or a plant stem does not run right behind your head. That keeps you from the awkward look of something appearing to grow out of your head. If a mirror or glass sits behind you, make sure lighting does not reflect off it.
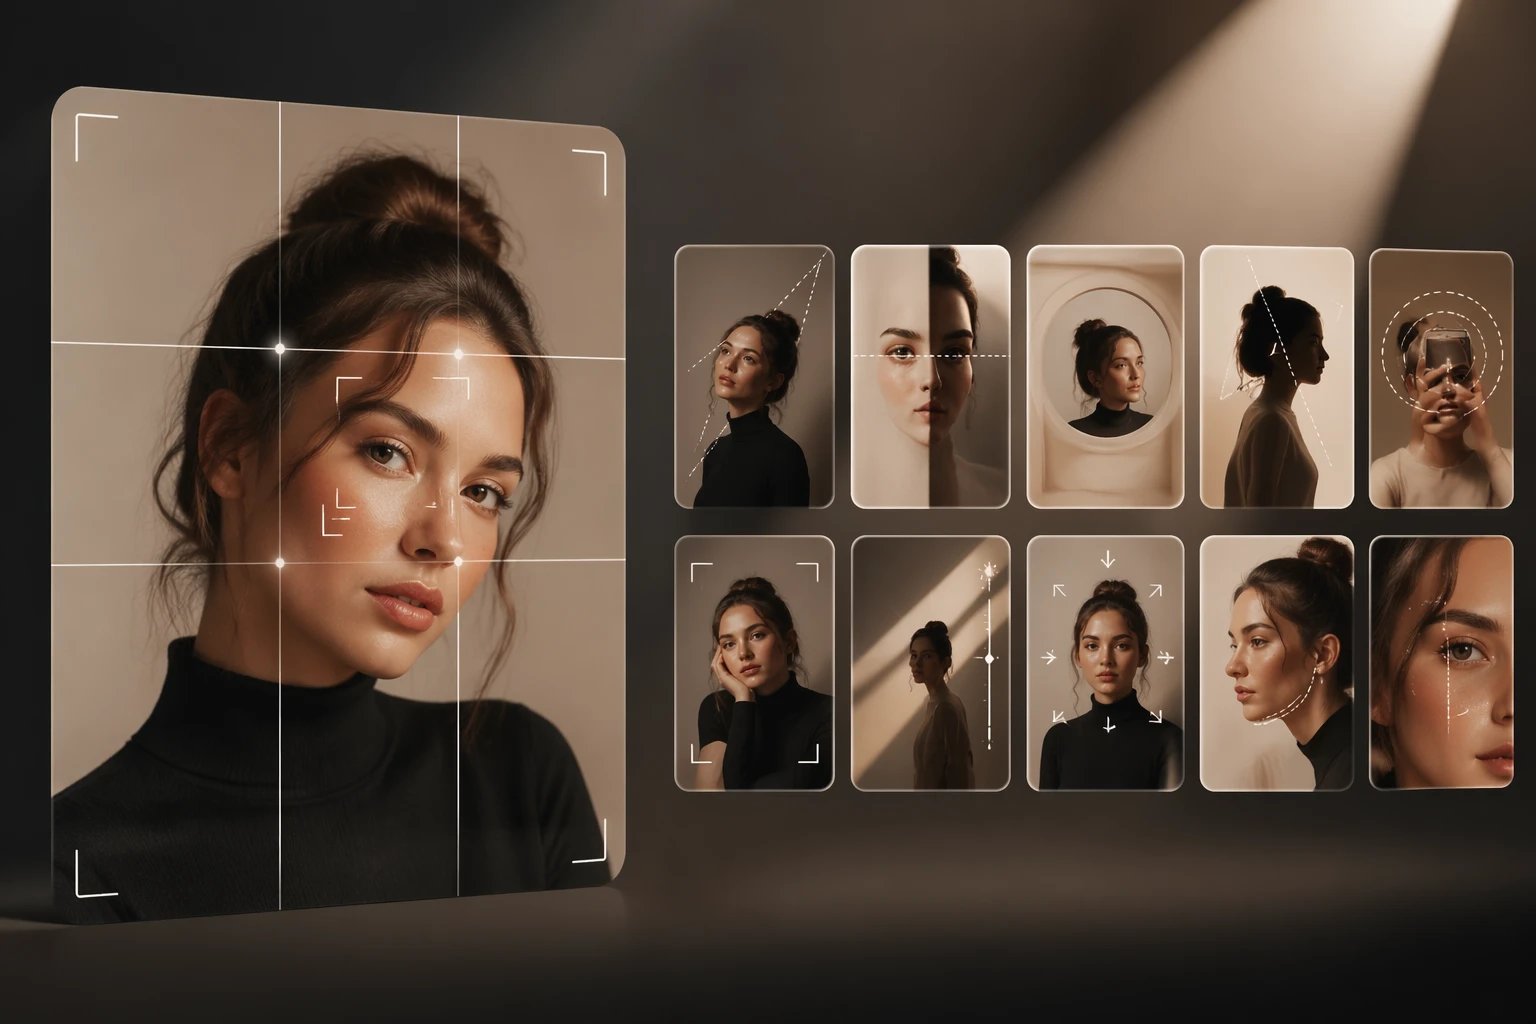
Camera at Eye Level, One Arm Away
Distance and height change the impression a lot. Hold the camera right up to your face and the wide angle makes the near nose large and the far ears small, distorting your proportions. That is why phone-close selfies tend to push the nose forward. Move the camera about one arm away, roughly a step, and zoom in a touch to bring proportions back to natural.
Eye level is the default height. Too low and the nostrils and underside of the chin get emphasized, too high and the forehead looks broad. Put the lens level with your eyes for the balanced look closest to what you see in a mirror.
If facing straight on feels stiff, turn your body slightly at an angle and rotate just your face toward the camera. It adds depth and reads less flat than a dead-on pose. Which side feels better differs from person to person, so try both and pick the one you prefer.
Use the Rear Camera with a Timer or Stand
The best image quality on a phone comes from the rear camera, not the front selfie one. Yes, you cannot watch the screen while shooting, but a timer or a stand makes solo shooting easy. Since the rear camera wins on both quality and proportions, it is worth using for a photo you care about like a profile.
No tripod is fine. Stack some books and lean the phone against them, or rest it on a shelf or window sill and set the timer to three or ten seconds. Adjust the book height so the lens sits at eye level, place your hand where you will stand, and check the focus once to cut down on misses.
Putting a chair or a small marker where you will stand makes it easy to land in the same spot every time. Get into position while the timer runs, and if it feels off, just shoot the next frame. Once you settle into the rhythm of changing your expression with each shutter, it gets easier.
Shoot Many Frames in Burst, Pose Simply
One single shot rarely lands. Burst mode captures several frames at once so you can drop the blinks and awkward beats and keep the most natural one. Shoot a few sets in the same pose while changing your expression a little each time to give yourself plenty of choice.
The simpler the pose, the better. Relax your shoulders and let them drop slightly, then push your chin a touch forward and at the same time tip it slightly down. This sharpens the jawline and lengthens the neck. It is a subtle forward reach of the chin, and keeping it small rather than exaggerated is the whole point.
For expression, breathe out right before the shot, and rather than forcing only the corners of your mouth, think of a real smile that reaches the eyes, a Duchenne smile. When the eyes smile along, you look far more natural and at ease. Tucking your hands lightly into pockets or raising one a little keeps them from freezing up.
A Quick Review-and-Reshoot Loop
Rather than firing off a hundred frames in one go, a short loop of shooting five to ten and checking right away is far more efficient. Zoom in to see whether focus landed on the eyes, whether the shadows are not too strong, and whether anything distracting sits in the background.
When you spot a problem, fix one thing at a time. If the face is dark, move closer to the window; if the nose stands out, push the camera farther away; if the forehead looks broad, lower the camera a little. Change only one thing per round so you can tell what actually helped. Repeating this check and reshoot just two or three times already makes a visible difference.
Finally, everything here is a for-fun styling and photo reference. There is no single correct answer, just a starting point for more comfortable photos you like, so adapt it freely to your own face and space and enjoy.