Editing Is Tidying, Not Lying
It is easy to assume retouching always means changing a face, but half of good editing is closer to tidying up. Lifting light the camera could not fully capture, pulling a color cast back toward neutral, removing a single speck of dust. That is often all you need. These steps simply show what was already there more clearly. They do not invent anything new.
The trouble starts when tidying quietly turns into building a different person. Knowing that boundary makes editing far more relaxed. In this guide we separate the light edits that almost always help from the heavy edits that go fake fast. The core idea is just one line. Keep your face yours.
Light Edits That Almost Always Help
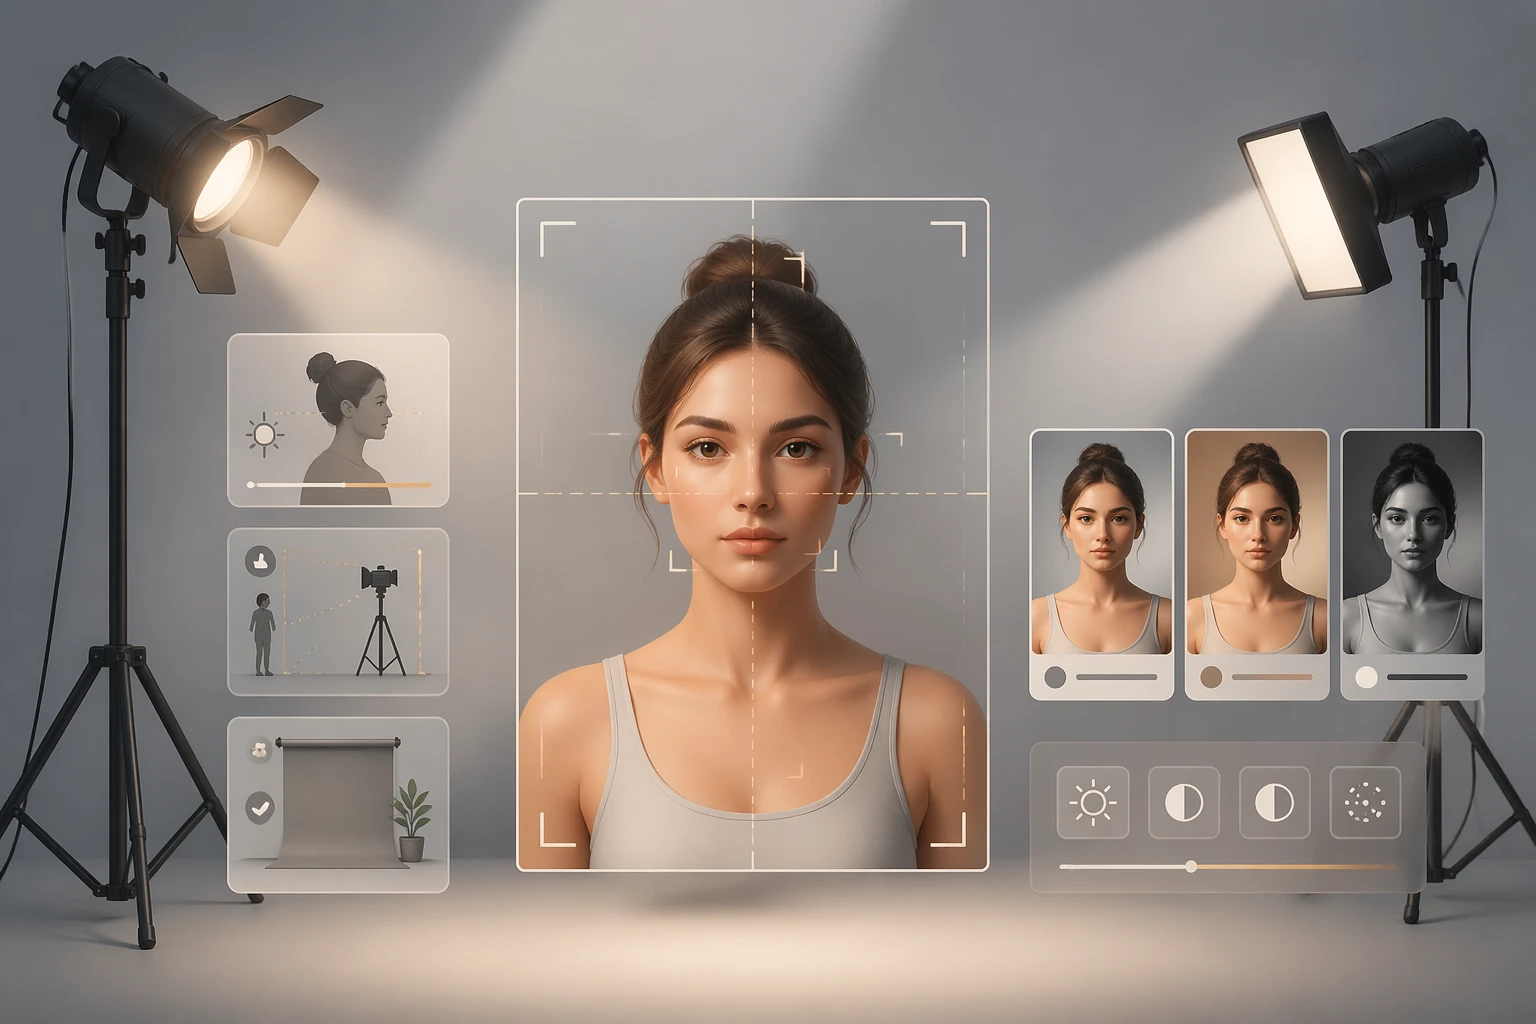
The safest high-impact move is exposure. If a shot came out dark, lift the brightness a little. If it blew out, pull it back so the face and background read naturally. Stop before shadow detail collapses into mush.
White balance makes a big difference too. If fluorescent light left you bluish or a warm bulb left you yellow, nudge the color temperature back toward neutral. When skin reads close to its real tone, not grey and not orange, you have it right.
Then a slight crop. Straighten a tilted horizon and cut away anything at the edge that steals attention. Using the rule of thirds to place a face or the eyes in a natural spot adds calm. Finally, spot-removing the dust, a passing blemish, or a stray hair from that one day is fine. These four steps do not change the photo. They tidy it toward you on a good day.
What Over-Smoothing Skin Does
In heavy editing, skin gives it away first. Crank smoothing too hard and pores, fine hair, and micro-texture vanish all at once, leaving skin that looks like plastic or wax. The eye reads texture without thinking, so even when someone cannot name exactly what is wrong, they feel something is off.
When areas that should hold soft shadow, beside the nose, around the mouth, under the eyes, go flat, the face loses depth and reads as a paper cutout. To keep texture, drop smoothing strength to half or less and apply it only in spots. Calm just the patch that is visibly uneven and leave the rest of the skin alone. Texture has to stay so light can land properly, and that is what makes a face look alive.
Warp the Eyes or Jaw and the Background Tells On You
Shape edits that enlarge eyes or slim a jaw are the riskiest zone, because the surrounding pixels get dragged along too. Push a jawline inward and the straight lines behind it, a door frame, tile grout, a window edge, a shoulder line, bend slightly. People catch a bent straight line instantly, so they often notice the edit from the background rather than the face.
Enlarging eyes can throw their size or position subtly out of step, leaving the gaze floating, while glasses frames or brow lines warp along with them. If you really want shape work, go very light and only on photos with few straight lines behind you. After editing, get in the habit of checking the vertical and horizontal lines in the background first, not the face. If they look bent, you have already gone too far.
The Teeth-Whitening and Over-Sharpening Trap
Whiten teeth too far and the faint warmth and translucency of real teeth disappear, so they drift toward grey or blue instead. Against the shadow inside the mouth, over-bright teeth can also look like they are floating. If you whiten, do not pull color out. Ease off only the heavy yellow so teeth still relate to lip and gum color.
Sharpening backfires when overdone too. Push clarity too high and a bright rim, a halo, forms around hair edges and the outline of the face, while harsh noise rises on the skin. Zoom to one hundred percent and check for a white band along the edges. If you can see it, lower the strength. Sharpening should clarify detail, not draw an outline. Restraining these two alone makes a photo noticeably more natural.
When the Photo and Real Life Do Not Match, Trust Drops
The real cost of editing happens off screen. If a profile photo looks too different from the person who shows up, the other side starts doubting whether the photo can be trusted before they even judge looks. For profiles that lead to meeting in real life, the moment that first five-second impression misaligns, it takes a long time to close the gap. A great-looking photo can turn into a minus.
So set one test and keep it simple. Could someone who saw this photo recognize me today. If yes, it passes. Let editing reach only you on a good day and never cross into being someone else. Natural photos build trust, and that trust is what ends up making the stronger impression.
A Restrained Editing Checklist and Closing
In order, here is the flow. First, set light and color to neutral with exposure and white balance. Second, straighten the horizon and crop only distracting edges. Third, spot-remove the blemishes and dust from that one day. Fourth, apply skin smoothing at half strength or less, and only in spots. Fifth, skip shape warping, heavy sharpening, and over-whitening where you can. Last, view it once more on a big screen, not a tiny one, and confirm the background straight lines are not bending.
All of this is a styling reference for better photos, not a rulebook. And the talk of mood or impression here is just a for-fun styling reference too. In the end the photo that lasts longest is the one where a viewer can recognize the real you. Keeping your face yours is the best editing standard there is.