Start by Understanding the Four Finishes
Base makeup begins with deciding on a finish. The main options are matte, semi-matte, natural, and dewy glow. Matte gives a shine-free, smooth look that suits anyone bothered by oiliness, while glow offers a lit-from-within luminosity. Semi-matte and natural sit in between, balancing a touch of light with comfortable coverage, which makes them an easy all-purpose choice.
Finish is not only about taste, it is tied to your skin type. For oily or combination skin, semi-matte or natural slows down breakdown. For dry skin, glow or natural keeps flakes from lifting. Rather than sticking to one formula, stay flexible and switch based on your skin condition that day. That single habit improves results more than any product upgrade.
Match the Occasion and the Light
The same face can call for different finishes depending on where you are going. In daylight, for everyday wear or a casual meetup, natural to glow looks fresh and alive. For indoor events with flash photography or days with lots of pictures, a strong glow can read as shine in photos, so semi-matte is the safer bet.
Whether the room uses cool fluorescent or warm incandescent light also changes how shiny you appear. For presentations or interviews where a polished impression matters, press the shine down slightly. For gatherings where a bright, radiant look counts, dial the luminosity up a notch. Deciding on the goal first makes choosing products much easier.
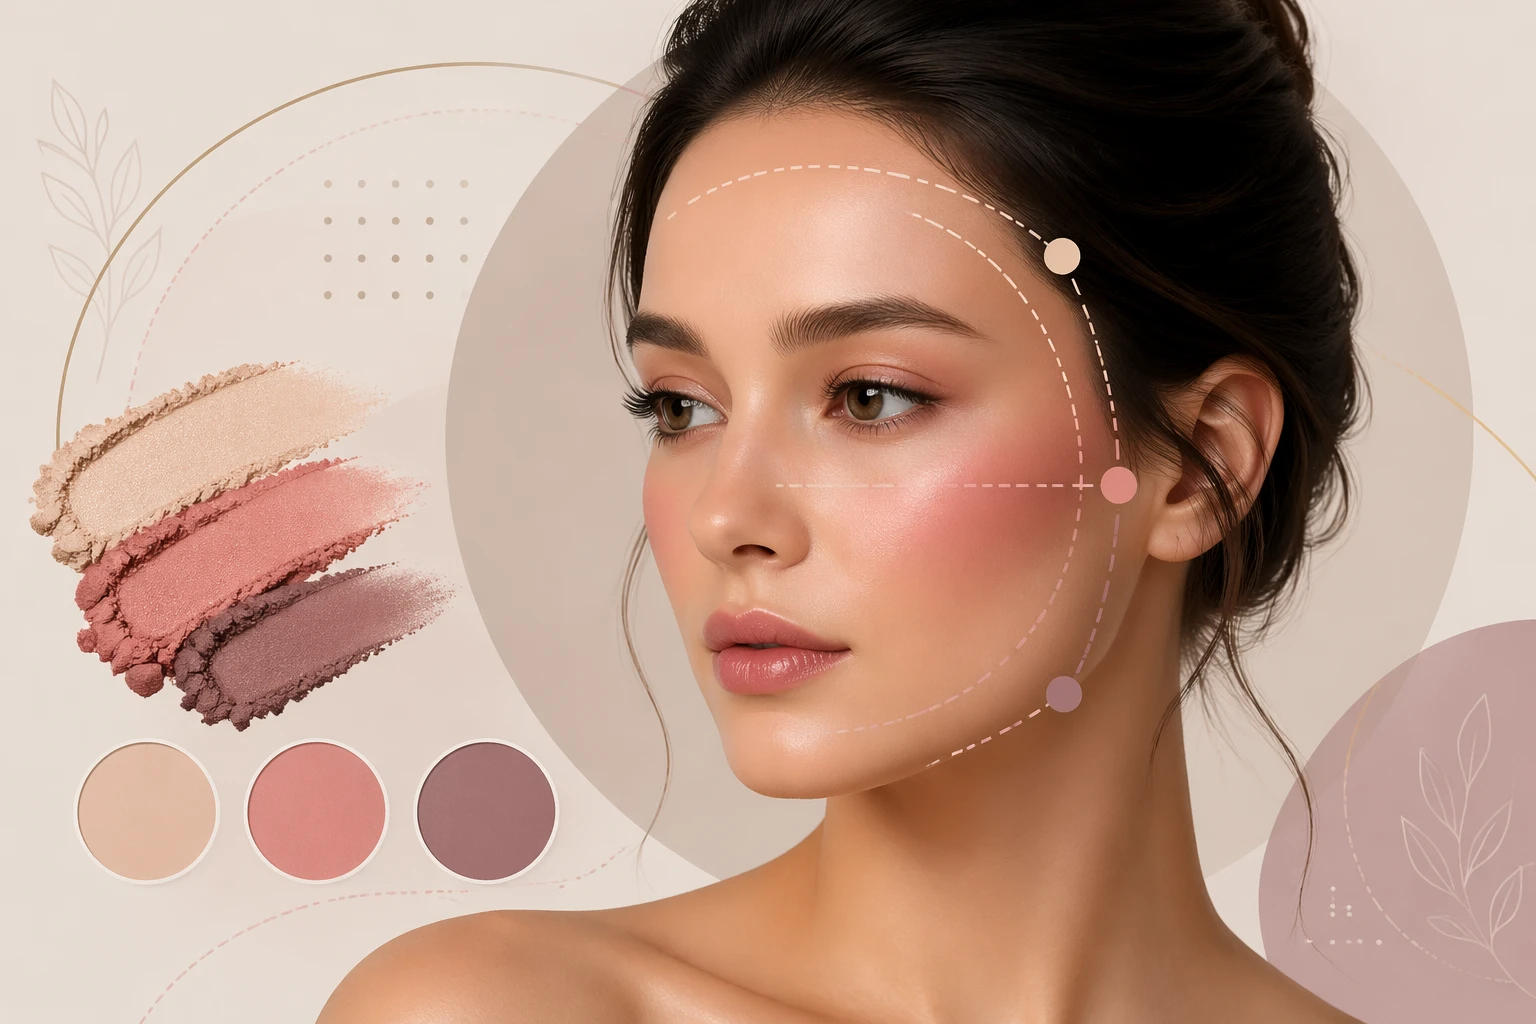
Match Undertone and Depth Together
When choosing a shade, do not look only at brightness, check your undertone too. If the veins on your inner wrist look green, you likely lean warm; blue suggests cool; and if it is hard to tell, you are probably closer to neutral. Warm skin melts with yellow or peach bases, cool skin with pink ones. When the tone is off, even a great product makes the face look like a separate layer.
Depth, meaning how light or dark the shade is, matters just as much. Going a shade lighter may look brighter for a moment, but it creates a visible line at the neck. The best reference is a color that flows seamlessly from face to neck. Since skin tone shifts with the seasons, keeping a summer and a winter shade lets you stay matched all year.
Prep the Canvas with Primer and Tone Correction
Once you have chosen a finish, smooth the canvas first. Primer fills pores and texture and helps the base last, so oily skin can pick an oil-controlling type and dry skin a hydrating one. Even this one extra step noticeably changes how the base applies and how long it holds. Give it a moment to sink in before your base, and everything sits more evenly.
If redness or dullness is a concern, use color correction lightly. Green counters redness, and a peach tone offsets dullness and dark circles, calming the overall tone. The key is to dab a small amount only on the areas that bother you. Spreading corrector thickly over the whole face only looks heavy and stuffy.
Test Along the Jaw in Daylight, Not the Hand
Test shades along the jawline rather than the back of your hand. Hand skin differs in tone from your face, so a match there can still float on your face. Swipe about three stripes where the jaw meets the neck, and the shade that disappears most into your skin is your match.
Always confirm in natural light. Indoor store lighting adds yellow or white casts that distort color. After swatching, step to a window or outside and look under daylight to see the true match. Some products shift color as they settle, so when you can, wait a few minutes and check again.
Layer Thin and Set Only the T-Zone
For coverage, the answer is thin layers built up, not one thick coat. Applying a lot from the start cracks along texture and looks suffocating. Spread a small amount, then lightly reinforce only where blemishes or redness remain, so you cover what needs covering while keeping skin looking thin and natural.
With setting powder, rather than dusting the whole face, focus on the T-zone, the forehead and nose, where shine appears fastest. Covering cheeks and the eye area with powder looks dry and kills the glow. The current trend leans away from flat matte toward a natural, skin-like luminosity. Using less and letting your real texture show actually looks more refined.
Everything here is just a playful styling reference for fun. There is no single right answer, so try what fits your skin and mood that day, and the finish you like best in the mirror is the one that works.